When your engine gets old, the head gasket will inevitably fail. While we highly recommend bringing your vehicle to a professional shop for work like this, here are the steps to replace a head gasket to give you a peek behind the garage door.
Here’s How To Replace Your Car’s Head Gasket:
- Obtain the service manual for your car.
- Dismantle the engine.
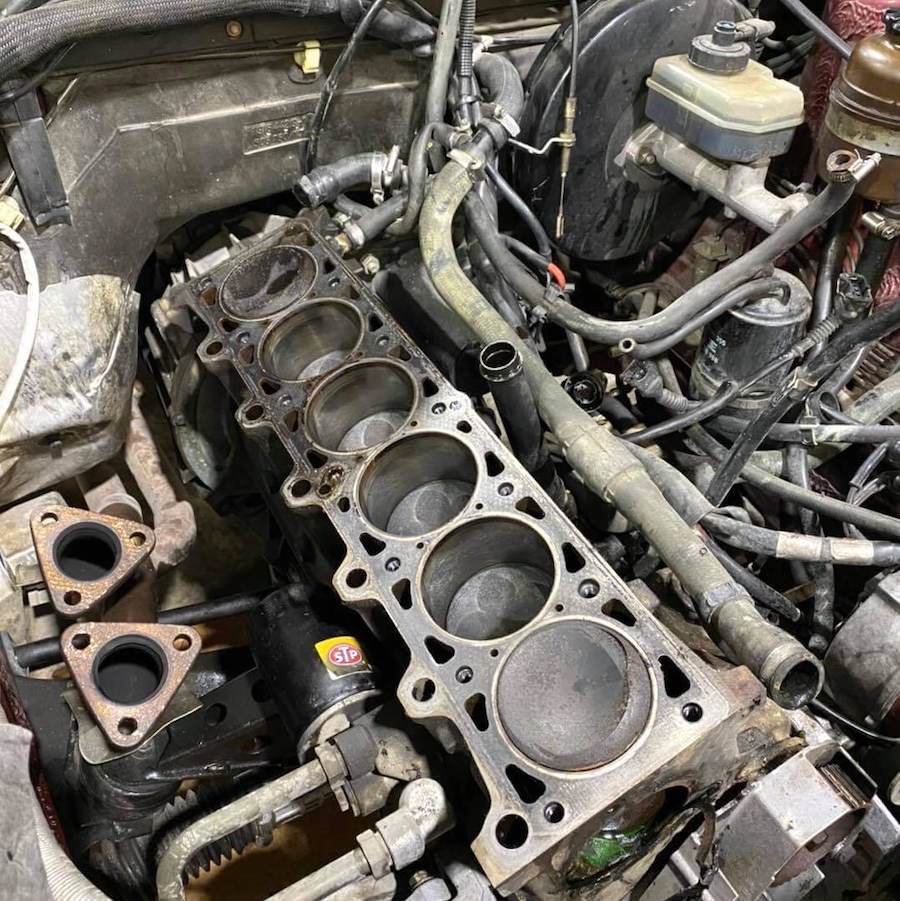
- Dismantle the cylinder head.
- Check the block for signs of warping.
- Remove the fasteners in sequence.
- Clean the engine block and cylinder head.
- Reassemble the head gasket onto the engine block.
- Tighten the head onto the block.
- Replace the other engine components you removed.
- Rotate the camshaft and crankshaft.
- Replace the oil filter, the engine oil, and coolant.
Read on for more details on each step to ensure a successful head gasket replacement.
1. Obtain the Service Manual for Your Car
The first step you need to take is to obtain a service manual for your car. The service manual will give you all the tools and parts needed and instructions on how to do everything. It also gives you specific, step-by-step instructions on how to do the procedure.
You can find the service manual for your car by looking on the manufacturer’s website or visiting a local auto store. Many auto stores offer free manuals with an oil change, so check with your local auto store first if you cannot find it online.
2. Dismantle the Engine
After getting the service manual, you need to dismantle the engine.
You’ll need to disconnect the battery and then drain the oil and coolant out of the engine to do this.
Here are the steps to follow in each case:
Disconnect the Battery
The first thing you need to do is disconnect the battery. The battery is the part that holds electrical energy, so this may be dangerous if not done properly (if you have any concerns, bring your vehicle to a trusted mechanic instead of attempting to do the work yourself). To disconnect it, find your battery under the hood of your car.
There will be a positive wire and a negative wire coming from it. Remove the positive wire from the battery by unbolting it and disconnecting the cable. Then, remove the negative wire by unbolting it.
Drain the Engine Oil and Coolant Out
Once you’ve disconnected your battery, you can finally dismantle your engine! Take off all belts running around your engine (there may be more than one) by loosening them with another socket wrench set.
Then drain out any oil left in the engine into an empty container or pan by removing all screws attached to where you can reach to remove the dipstick tube and the oil cap.
Drain out your coolant by removing the radiator cap and loosening a hose clamp on top of one part of your radiator that has a hose going into it.
Here’s a video that describes the head gasket replacement process in detail:
3. Dismantle the Cylinder Head
The third step is to take off the cylinder head. To do this, you’ll need to start from the back of the car and work towards where you have access with tools.
To dismantle the cylinder head, follow these steps:
- Remove anything in your way, such as snow shields or plates holding extra components in place.
- Start from the back of the car and unscrew all ten bolts connecting your exhaust manifold using a socket wrench set.
- Disconnect any electrical wires attached to components in front of where you can reach with a socket wrench set.
- Remove the bolts connecting your engine components such as the alternator and the power steering pump to disconnect any belts running around these components and then detach them from where they connect to the engine with a socket wrench set.
With all of this out of your way, you can now begin taking off your cylinder head:
- Remove the nuts holding down brackets attaching your brake line and coolant tube onto your cylinder head using a metric wrench set or socket wrench set.
- Once these are removed, take off any screws holding down pieces of your frame holding up suspension connecting suspension springs and anything else underneath where you can reach.
- Once this is done, you can take off ten bolts on both sides (front and back) of your cylinder head, holding it down onto the engine block.
- With all the bolts removed, you can remove any brackets or pieces attached to your exhaust manifolds, such as sensors or tubes. Then take off the bolts attaching your exhaust manifold to the cylinder head and then detach it from where it connects behind your engine.
4. Check the Block for Signs of Warping
The fourth step is checking if there are signs of warping in either the block or the head itself. There aren’t really any tools required, but you should have a specific socket wrench set with extensions that would allow you to check different parts inside an engine.
This isn’t necessary, though, because even without one, you can see if anything is warped by carefully inspecting your engine. You should see signs of warping if you closely look at the cylinder head, block, and other parts such as the bolts and brackets.
5. Remove the Fasteners in Sequence
The fifth step is to remove all fasteners holding down your engine components in order of what you can reach with tools.
Start from the back of your car by removing any screws, brackets, or bolts holding down your exhaust pipes onto your catalytic converter.
Next, you can take out your catalytic converter itself using a metric wrench set or socket wrench set. If there are screws holding it down, take them off before detaching it from where it connects behind the engine block by hand.
After this, you can begin taking away anything in front on top of where you can reach, like center parts attached to the underside of the frame (most of these are bolts).
Once all of this is taken away, you can remove anything underneath on top of where you can reach, like the radiator and whatever else attaches to your cylinder head (most likely bolts, if not screws).
6. Clean the Engine Block and Cylinder Head
The sixth step is cleaning any dirt or grime off the engine block and cylinder head. This will allow for better adhesion of new gaskets. Here are some steps on how to easily do this:
- Screw some bolts into the engine block to check for signs that there may be something wrong with it (such as warping and scratches).
- Spray around your engine with a can of air you can buy in any hardware shop to get rid of dirt and grime.
Once all this is done, you’re ready for the final steps.
7. Reassemble the Head Gasket onto the Engine Block
The seventh step is to put back on whatever gaskets or pieces you took off. This process shouldn’t be too different or complicated for most people since it’s usually only putting back screws and bolts.
If there are more specific gaskets required, ensure you consult your service manual. Before putting these components back, make sure they’re clean like before (to allow for good adhesion).
8. Tighten the Head Onto the Block
The eighth step is tightening down your cylinder head from earlier.
Here’s how to do it:
- Start tightening down your cylinder head with a ratchet and socket wrench set.
- Continue doing this as tight as you can go without using too much force (again, some information may depend on your service manual).
9. Replace the Other Engine Components You Removed
The next step is to put back on anything you removed before. This process should be easier than taking them off since you should know exactly where everything goes by now.
- Replace your intake manifold, valves, and other components which attach to the cylinder head.
- Start putting bolts or screws in one by one (to make tightening down faster) using either a metric wrench set or socket wrench set.
- Put back whatever else attaches to the cylinder head like what you did earlier.
10. Rotate the Camshaft and Crankshaft
The next step is rotating your camshaft and crankshaft into their correct positions (most likely, they already are). When this is done correctly, there will be no more misaligned marks along each of your valves (if you’re using a timing belt, this is when you should replace it).
Attach the crank position sensor back onto where it was originally attached at the back of the engine block.
Check to see if there’s any wire connection going from your camshaft position sensor to where it was originally attached in a specific spot in your cylinder head.
Once this is done, rotate your crankshaft and camshaft into their correct positions, ensuring no more misaligned marks. If either one of these sensors is incorrect, it will cause problems with how many times the cylinders fire, so make sure they’re put back on correctly!
11. Replace the Oil Filter, the Engine Oil, and Coolant
The next step is replacing your engine oil, oil filter and coolant. This process should be relatively simple, but make sure to read your service manual if you have any questions or concerns.
Here are the steps to follow in this case:
- Replace the old oil and coolant with new ones.
- Attach all hoses back onto their proper spots.
- Put all other filters back onto where they originally were attached at either the engine block or cylinder head.
Finally, make sure there are no more leaks by running the engine for a couple of minutes and checking underneath any dirt or debris coming out.

Conclusion
Head gasket replacement is a pretty big task to take on, so make sure you know what you’re getting yourself into before starting. It’s not only dangerous since there are parts that could potentially burn you, but it’s also time-consuming and expensive.
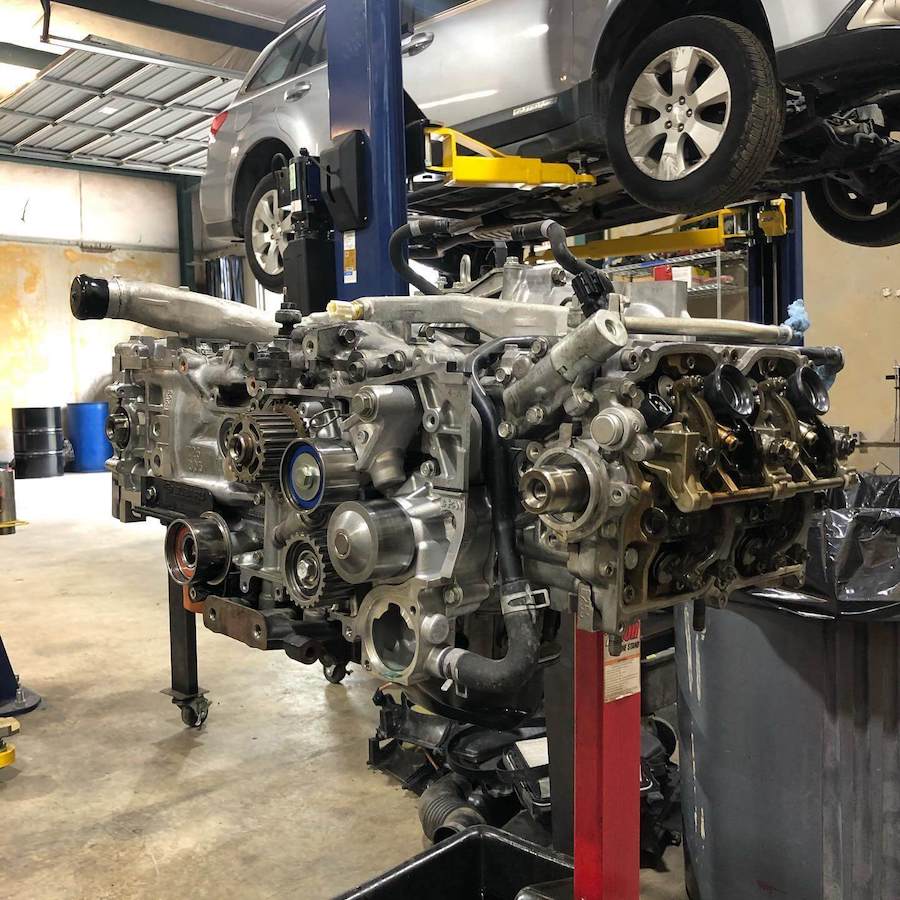
If you’ve done everything correctly throughout this guide, then hopefully, your car should be running better than ever with no more leaks. If you need professional help with this, reach out to SL Autoworks. We do head gasket replacement for Subarus and BMWs with all their parts, service, and advice included!